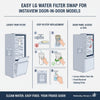
Easy LG Water Filter Swap for InstaView Door-in-Door Models
, by ABM Service, 3 min reading time
""Free Shipping on USA"" We do not provide any authorization invoice for amazon Resale.
, by ABM Service, 3 min reading time
Clean water matters for every home that uses an LG InstaView refrigerator. The water filter helps keep drinking water fresh and safe by reducing unwanted particles and odors. A clean filter also helps keep water tasting better every day. The replacement process is quick and simple and does not need any tools.
The LG InstaView water filter works inside your refrigerator to reduce contaminants and support clean drinking water. It also helps reduce chlorine taste and odor so water tastes fresh. Most LG refrigerator water filter units sit inside the upper corner or near the base grille, depending on the model. Regular replacement helps the fridge keep a steady water flow and good water quality over time.
Most LG water filters need replacement every 6 months for steady performance. Some homes may need earlier changes based on water use and water quality. The refrigerator also gives alerts when the filter needs attention through a small indicator light on the control panel.
Common signs of a clogged filter include:
These signs help you know the right time for a new LG InstaView water filter.
This job needs very few items and takes only a short time. Most users finish it in minutes without help.
The filter usually sits inside the refrigerator compartment or at the lower grille area. The exact spot depends on the LG InstaView model. A quick look inside the manual can help confirm the exact position.
Turn the filter counterclockwise or press the release button if your model uses one. Pull the filter out slowly to avoid spills. Keep the area clean while removing it.
Line up the new LG refrigerator water filter with the slot. Push it in firmly and turn it clockwise until it locks in place. A proper fit helps prevent leaks and keeps water flow steady.
Run about 2 to 3 gallons of water through the dispenser. This step clears air and loose carbon particles from the new filter. Water may look cloudy at first, but it should clear after flushing.
Press and hold the “Filter Reset” button on the control panel. Hold it until the light changes or turns off. Some LG InstaView models may show a slightly different reset process, so check your model guide if needed.
Small errors can affect water flow and filter life. Paying attention to detail helps avoid problems later.
Good habits help your LG water filter work better and last longer. Simple steps also help keep water taste fresh.
Replacing an LG InstaView water filter takes only a few minutes and needs no tools. A fresh filter supports better-tasting water and steady dispenser flow. Regular replacement also helps your refrigerator work with fewer issues over time. Keeping up with this simple task supports long-term kitchen performance and clean drinking water every day.


